Fascia boards serve as the protective barrier between your home’s roof edge and the elements, supporting gutters while creating a finished appearance along your roofline. These boards run along the edge of your roof and endure constant exposure to rain, snow, wind, and temperature fluctuations that gradually cause deterioration over time.
Weather damage, leaks, and natural aging eventually require fascia board replacement to maintain your home’s structural integrity and curb appeal. Rotting wood, peeling paint, visible gaps, or sagging gutters often signal the need for immediate attention to prevent more extensive damage to your roofing system.
Understanding when to replace fascia boards versus repair them helps homeowners make informed decisions about this important maintenance project. Simple cosmetic issues might require only minor repairs, while extensive rot or structural damage typically needs a complete fascia board installation with new materials.
The fascia board replacement process involves removing old boards, inspecting underlying structures, and installing new materials that complement your home’s exterior. Modern fascia board materials offer improved durability and weather resistance compared to traditional options, providing better long-term protection for your investment.
Identifying When Your Fascia Boards Need Replacement
Recognizing the warning signs of fascia board deterioration prevents minor issues from becoming major structural problems. Rot represents the most serious concern, appearing as soft, discolored wood that easily crumbles when touched. Dark stains, musty odors, or visible mold growth indicate moisture damage that compromises the board’s integrity and requires immediate fascia board installation.
Warping and sagging create noticeable visual distortions along your roofline while affecting gutter alignment and water drainage. Pest damage, like small holes, tunnels, or sawdust-like debris around the boards, could mean carpenter ant or termite activity that weakens the structure from within.
Paint peeling, cracking, or bubbling exposes bare wood to moisture penetration, accelerating the decay process. Gaps between fascia board materials and adjacent surfaces allow water in which damages underlying roof components.
A safe inspection requires a sturdy ladder, flashlight, and a small probe tool like an awl or screwdriver to test suspicious areas. Check the connection points where gutters and fascia boards meet, examining for loose fasteners or separation that affects system performance. Focus attention on areas receiving heavy water exposure, including valleys, downspout locations, and sections with poor drainage patterns that can accelerate deterioration.
Choosing the Right Materials for Your New Fascia Boards
Selecting appropriate fascia board materials significantly impacts the longevity and performance of your replacement project. Wood remains a popular traditional option, offering natural beauty and easy workability for custom installations. Cedar and redwood provide excellent rot resistance, while pressure-treated lumber offers a budget-friendly option with decent moisture protection. However, wood requires regular maintenance, including painting or staining every few years to prevent deterioration.
Composite fascia board materials combine wood fibers with synthetic polymers, creating boards that resist moisture, insects, and rot while maintaining a wood-like appearance. These products eliminate the need for frequent repainting and offer superior dimensional stability compared to natural wood options.
Aluminum fascia boards deliver exceptional durability and weather resistance with minimal maintenance requirements. The lightweight metal installs easily and comes in various colors and finishes that complement different architectural styles. Vinyl represents the most budget-friendly option, providing good moisture resistance and easy fascia board installation, though it may become brittle in cold conditions.
Climate considerations play an important role in material selection for damaged fascia board repair projects. Areas with heavy precipitation benefit from aluminum or composite materials that handle constant moisture exposure. Budget constraints, maintenance preferences, and architectural compatibility guide the final decision between these fascia board materials options.
Essential Tools and Supplies for Fascia Board Replacement
Successful fascia board installation requires specific tools to ensure precise cuts, secure attachment, and professional results. A circular saw or miter saw handles cutting materials to exact lengths, while a reciprocating saw removes old boards efficiently. Power drills with various bit sizes drive in screws and create pilot holes, preventing the wood from splitting during installation.
Measuring equipment, including a tape measure, level, and chalk line, ensures accurate alignment and proper fit between sections. For removal, hammers, pry bars, and utility knives are great tools, but should be used carefully. Safety gear represents the most critical components, including safety glasses, work gloves, non-slip shoes, and a sturdy ladder rated for your weight and the weight of the materials.
Material requirements vary based on project scope and chosen fascia board materials. Galvanized or stainless steel screws provide superior holding power and corrosion resistance compared to nails for long-term durability. Exterior-grade caulk seals gaps between boards and adjacent surfaces, preventing moisture infiltration that leads to damaged fascia board repair needs.
Primer and paint protect wood surfaces from weather damage while maintaining a consistent appearance with existing trim. Calculate quantities by measuring total linear feet of fascia boards, adding 10% for waste and cuts. Purchase fasteners, caulk, and primer based on the manufacturer’s recommendations for the coverage area. Having extra materials on hand prevents project delays when unexpected repairs or adjustments become necessary during the fascia board installation process.
The Process for Removing Old Fascia Boards
The removal of damaged fascia boards begins with safety preparations that protect both the worker and the surrounding property. Extension ladders should be placed on level ground with the base placed 1 foot away from the house for every 4 feet of ladder height. Secure the ladder’s feet with stabilizers and be sure that there is a spotter at the base during the entire process. Clear the work area of obstacles and cover landscaping with tarps to protect plants from falling debris.
Disconnect gutters from fascia boards by removing hangers, brackets, and downspout connections before starting removal work. Support gutter sections with temporary bracing or assistance to prevent damage during this process. Remove any trim pieces, decorative elements, or caulk that attach to the fascia boards using a utility knife to score sealed joints cleanly.
Begin removing old boards by locating and extracting all fasteners, including screws, nails, or clips securing the material to rafters. Use a reciprocating saw to cut through stubborn fasteners when removal proves difficult, taking care not to damage underlying roof components. Work systematically from one end to the other, supporting sections to prevent them from falling unexpectedly.
Examine exposed rafter ends and underlying structures for signs of rot or damage requiring attention before fascia board installation proceeds. Clean debris from mounting surfaces and check for proper alignment of structural components. This careful removal process preserves surrounding soffits and roof elements while preparing surfaces for the successful installation of new fascia board materials.
Installing Your New Fascia Boards Properly
Accurate measurements form the foundation of professional fascia board installation results. Begin by measuring each section individually rather than assuming uniform lengths, as older homes often have slight variations in rafter spacing and alignment. Use a chalk line to mark reference points along the rafter ends, ensuring consistent positioning for the new boards. Cut fascia board materials approximately ⅛ inch longer than measured to allow for minor adjustments during fitting.
Creating clean, straight cuts requires proper technique with sharp saw blades designed for your chosen material type. Support both sides of the board during cutting to prevent binding or splintering that affects the finished appearance. Test-fit each piece before proceeding to the next section, checking for proper alignment with adjacent boards and architectural elements.
Position boards with the finished face oriented correctly and maintain consistent spacing where gutters and fascia boards connect. Pre-drill pilot holes to prevent splitting, especially near board ends where stress occurs. Drive fasteners into solid wood at rafter locations, avoiding areas between structural supports that provide inadequate holding power.
Secure each board with corrosion-resistant screws spaced 12 inches apart along the length, ensuring fasteners penetrate at least 1 inch into solid wood. Fill screw heads slightly below the surface and apply exterior caulk to seal joints between board sections. Prime all exposed wood surfaces immediately after installation to prevent moisture absorption while preparing surfaces for final paint or stain application that completes the fascia board installation process.
Connecting Gutters and Final Maintenance Tips
Proper gutter reattachment to new fascia boards requires careful attention to alignment and support to ensure effective water management. Begin by checking that the fascia board installation created level surfaces with consistent positioning along the roofline. Install new gutter hangers at rafter locations every 2 feet, ensuring fasteners penetrate at least 2 inches into solid wood for maximum holding power.
Slope gutters toward downspouts at a ¼ inch drop per 10 feet of run to promote proper drainage and prevent standing water that damages both gutters and fascia boards. Use a string line or level to verify the correct pitch before securing all hangers permanently. Test the system thoroughly by running water from a garden hose to identify any areas where water pools or drainage appears inadequate.
Long-term maintenance practices significantly extend the lifespan of new fascia board materials and prevent costly damaged fascia board repair issues. Schedule annual inspections each fall to examine connections between gutters and fascia boards, looking for loose fasteners, gaps in caulk joints, or early signs of moisture infiltration.
Keep gutters clean and free of debris that creates overflow conditions, leading to fascia board deterioration. Trim tree branches away from the roofline to reduce leaf accumulation and prevent physical damage during storms. Touch up paint or stain on wood surfaces every three to five years, addressing any areas where the protective coating shows wear or weathering that exposes bare material to moisture damage.
Trust Prestige Roofing LLC for Expert Fascia Board Replacement
If you’re noticing signs of wear and tear on your fascia boards, such as rot, warping, or peeling paint, it might be time to consider a replacement to protect your home’s integrity. Choosing the right materials and ensuring proper installation are crucial to the longevity of your fascia boards. Don’t let damaged fascia boards compromise your home!
Prestige Roofing LLC specializes in fascia board replacement, offering a range of materials, including wood, composite, aluminum, and vinyl, to suit any home style and budget. Our experienced team ensures that your new fascia boards are installed correctly, integrating seamlessly with your gutters for optimal performance and aesthetic appeal.
Ready to enhance your home’s curb appeal and functionality? Contact Prestige Roofing LLC today at (920) 791-0414 to schedule your consultation and ensure your home is protected year-round.
Related Articles
-
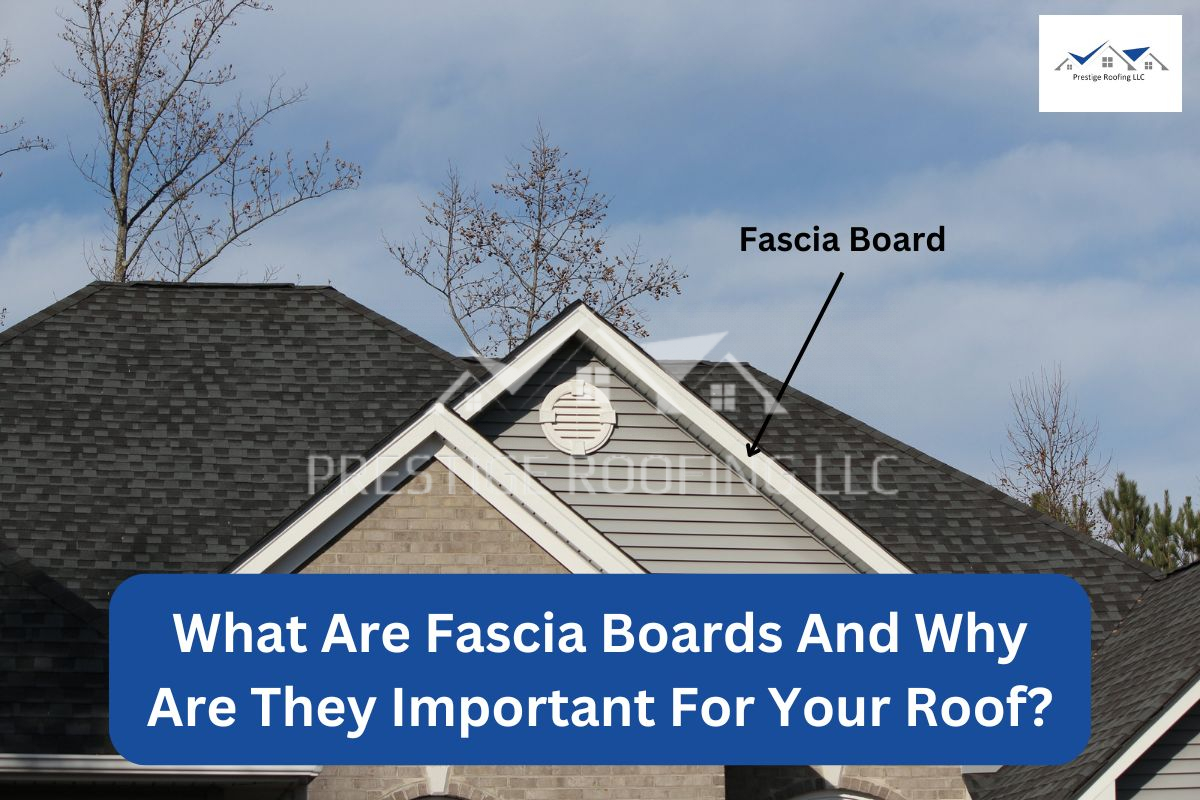 September 20, 2024What Are Fascia Boards And Why Are They Important For Your Roof?Fascia boards might not grab your attention like other roofing components, but they play an important role in protecting your roof. These boards sit right at the edge of your roof, supporting the gutters and preventing water and pests from getting into your home. In this blog post, we’ll go over why fascia boards are […]
 -
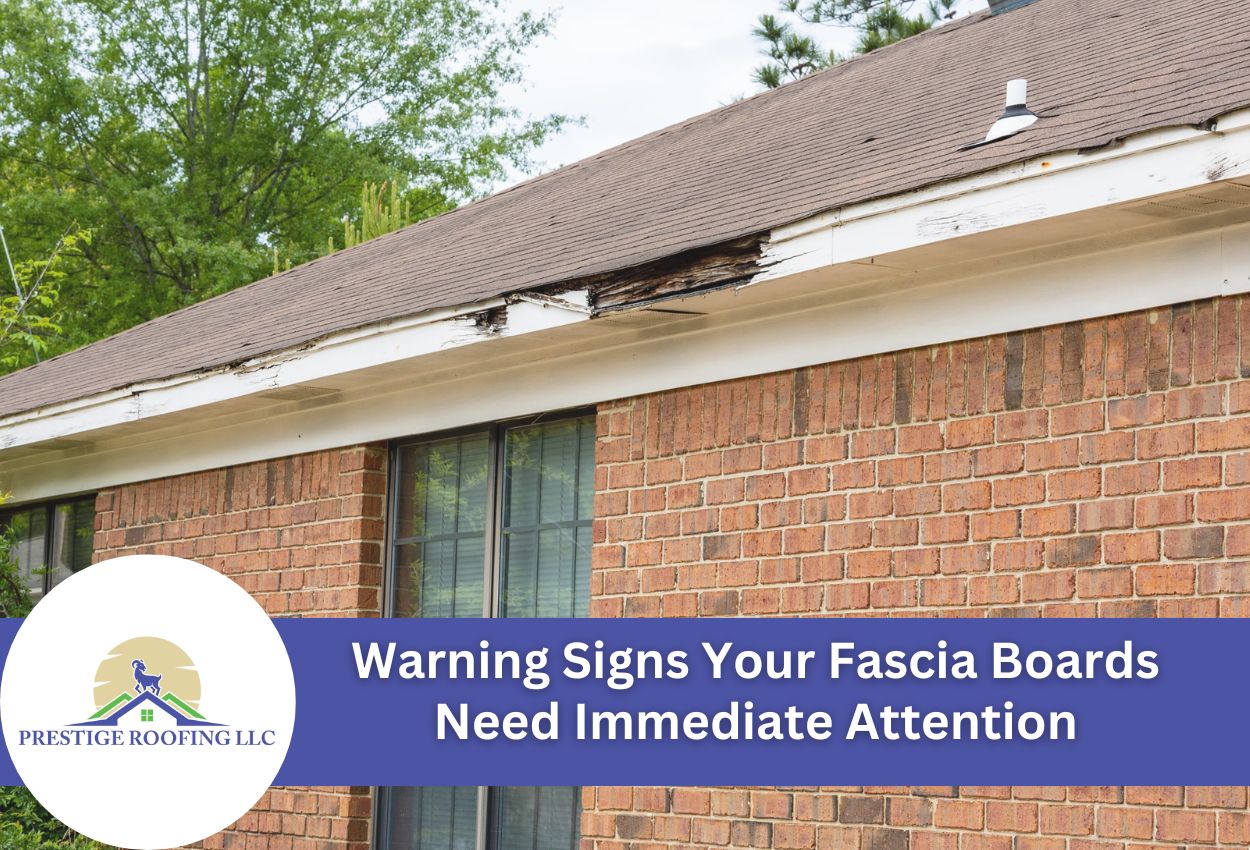 September 9, 2025Warning Signs Your Fascia Boards Need Immediate AttentionConcerned about hidden home damage? Discover the signs of fascia board issues to prevent structural and moisture problems.
 -
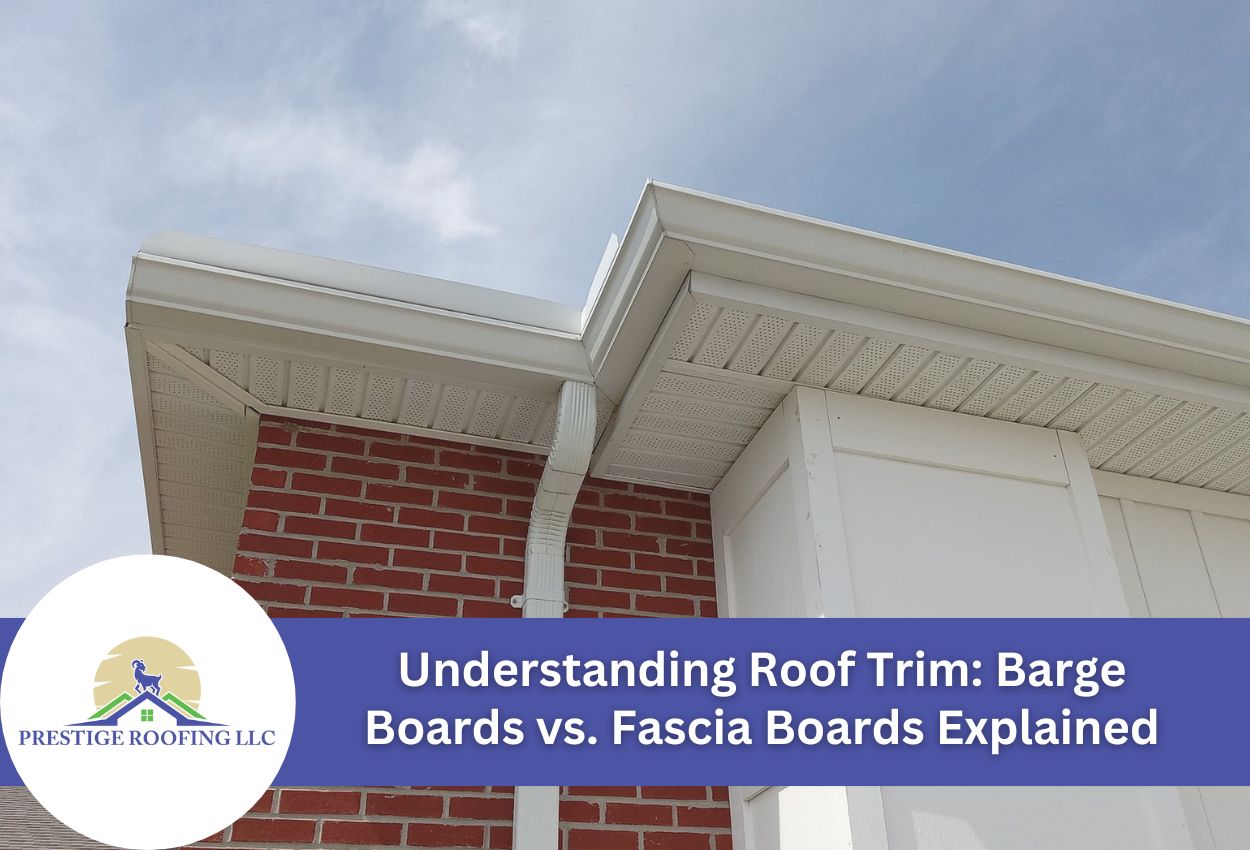 June 1, 2025Understanding Roof Trim: Barge Boards vs. Fascia Boards ExplainedConfused by roof trim terms? Discover the key differences between barge boards and fascia boards to better understand your home’s roof structure.
Protect Your Home with Expert Roofing
Don’t wait for leaks or storm damage to cause costly repairs. Our experienced roofing team provides fast, reliable service, high-quality materials, and lasting results. Ensure your home stays safe, secure, and looking great—contact us today for a free estimate.